| Author |
Message |
|
TheCodeSamurai
BR Member
Joined: Sat Mar 22, 2014 2:14 pm Posts: 2075 Country:  Gender:
 Anime Girl
Currently Playing: SSF2, MGS 3, Melee, Project M

|
Agreed. I might believe Marth 70-30's Sora, but Ichigo?
|
| Thu Oct 29, 2015 9:04 pm |
|
 |
|
rg
Joined: Wed Jan 28, 2015 12:31 pm
Posts: 341
Gender: N/A

|
Ichigo destroys Sora in neutral, and with Ichi's giant sword, Sora struggles a lot with approaching. Ichi outspaces him a lot, so Sora has to punish Ichigo and make as many reads as possible. Ichigo has no problem edgeguarding Sora, or killing him either. I'm not sure if Sora ever has a reliable edgeguarding move against Ichigo tbh, cause of Sora's low priority. And since Ichi is pretty heavy, Sora is gonna struggle a lot with killing Ichigo. _________________ Kaioken is red Kaioken is red
Rasengan is blue
Why are anime characters in SSF2
|
| Fri Oct 30, 2015 2:30 pm |
|
 |
|
scumbag
Joined: Mon Jul 28, 2014 8:29 am Posts: 114 Country:  Gender:
 Male
MGN Username: scum

|
Is there a reason why sora's down tilt only does 4 damage? I'm mean it's in no way his biggest problem. But for a character who is supposed to have a good damage output, one of his best moves should at least do reasonable damage.
|
| Tue Nov 03, 2015 2:58 pm |
|
 |
|
TSF.Strife
BR Member
Joined: Tue Jul 29, 2014 2:58 pm Posts: 1838 Location: Everywhere and Nowhere Country:  Gender:
 Male
MGN Username: CSWooly
Skype: CSWooly
Currently Playing: Fire Emblem Fates: Birthright, SSF2, SSB4, League of Legends.

|
I don't have a clue, however you can chain a few DTilts at a low percent into an FSmash, so that's not too bad. Also, there is a Sora guide on the way. If anyone wants to help co-author it, PM me for edit access. _________________Follow me on Twitter here.Youtube channel.  Click to expand thumbnail
SSF2 Backroom Character Analyst and Labber Mains: :lucario: 
|
| Tue Nov 03, 2015 4:22 pm |
|
 |
|
TSF.Strife
BR Member
Joined: Tue Jul 29, 2014 2:58 pm Posts: 1838 Location: Everywhere and Nowhere Country:  Gender:
 Male
MGN Username: CSWooly
Skype: CSWooly
Currently Playing: Fire Emblem Fates: Birthright, SSF2, SSB4, League of Legends.

|
_________________Follow me on Twitter here.Youtube channel.  Click to expand thumbnail
SSF2 Backroom Character Analyst and Labber Mains: :lucario: 
Last edited by TSF.Strife on Sat Oct 15, 2016 2:37 pm, edited 2 times in total.
|
| Thu Nov 05, 2015 4:10 pm |
|
 |
|
Doq
BR Member
Joined: Tue May 15, 2012 5:21 pm Posts: 2198 Location: in your heart, and your archives Country:  Gender:
 N/A
MGN Username: Doq
Skype: Discord my guy.
Currently Playing: one of thousands of variations of Solitaire
Waifu: Es

|
Good to know, time to pick up sora
_________________this post is an enigma. a dream.
|
| Thu Nov 05, 2015 4:24 pm |
 
|
 |
|
rg
Joined: Wed Jan 28, 2015 12:31 pm
Posts: 341
Gender: N/A

|
If I can't secondary Zelda, you can't pick up Sora. GG, Doq.  // _________________ Kaioken is red Kaioken is red
Rasengan is blue
Why are anime characters in SSF2
|
| Thu Nov 05, 2015 5:23 pm |
|
 |
|
Gemini
Joined: Thu Jul 24, 2014 9:19 pm Posts: 1422 Location: Canada Country:  Gender:
 Male
MGN Username: ShadowAssasin2600
Skype: chaoticshadow50

|
4% is kinda low, but its a really good combo tool. _________________Mains  and 
|
| Thu Nov 05, 2015 9:47 pm |
|
 |
|
TSF|Cookies
BR Member
Joined: Fri Sep 26, 2014 1:33 pm Posts: 2002 Country:  Gender:
 Male
MGN Username: TSF|Cookies
Currently Playing: PM, Melee, Ultimate, Hollow Knight

|
You forgot 
|
| Fri Nov 06, 2015 12:41 am |

|
 |
|
TSF.Strife
BR Member
Joined: Tue Jul 29, 2014 2:58 pm Posts: 1838 Location: Everywhere and Nowhere Country:  Gender:
 Male
MGN Username: CSWooly
Skype: CSWooly
Currently Playing: Fire Emblem Fates: Birthright, SSF2, SSB4, League of Legends.

|
_________________Follow me on Twitter here.Youtube channel.  Click to expand thumbnail
SSF2 Backroom Character Analyst and Labber Mains: :lucario: 
|
| Fri Nov 06, 2015 2:27 am |
|
 |
|
TSF.Strife
BR Member
Joined: Tue Jul 29, 2014 2:58 pm Posts: 1838 Location: Everywhere and Nowhere Country:  Gender:
 Male
MGN Username: CSWooly
Skype: CSWooly
Currently Playing: Fire Emblem Fates: Birthright, SSF2, SSB4, League of Legends.

|
Double post (pls don't kill me)I've started a blog on MG Wiki regarding Sora, and ways to improve with him. These will act as snippets and I will almost certainly include this in the Sora guide I'm making: Here is the blogThe first entry in the blog regards every Sora main's favourite risky approach/recovery option: Flowmotion. I hope you all enjoy reading. My next entry will probably be one of Sora's other special moves. It'll most likely be Finishing Leap, but I don't know as of now. I plan to cover all of his special moves, ground combos and neutral game, air combos and air game and a bit on matchups. These will then be amalgamated into the Sora guide. _________________Follow me on Twitter here.Youtube channel.  Click to expand thumbnail
SSF2 Backroom Character Analyst and Labber Mains: :lucario: 
|
| Mon Nov 09, 2015 11:42 am |
|
 |
|
yamnow
Joined: Fri May 08, 2015 8:49 pm Posts: 465 Country: 

|
can he spike?
|
| Mon Nov 09, 2015 3:38 pm |
|
 |
|
TSF.Strife
BR Member
Joined: Tue Jul 29, 2014 2:58 pm Posts: 1838 Location: Everywhere and Nowhere Country:  Gender:
 Male
MGN Username: CSWooly
Skype: CSWooly
Currently Playing: Fire Emblem Fates: Birthright, SSF2, SSB4, League of Legends.

|
He can meteor smash by flowcancelling an upwards flowmotion into a downwards flowmotion, however, the knockback is terrible so I don't think it would ever work as a KO move. _________________Follow me on Twitter here.Youtube channel.  Click to expand thumbnail
SSF2 Backroom Character Analyst and Labber Mains: :lucario: 
|
| Mon Nov 09, 2015 4:55 pm |
|
 |
|
TSF.Strife
BR Member
Joined: Tue Jul 29, 2014 2:58 pm Posts: 1838 Location: Everywhere and Nowhere Country:  Gender:
 Male
MGN Username: CSWooly
Skype: CSWooly
Currently Playing: Fire Emblem Fates: Birthright, SSF2, SSB4, League of Legends.

|
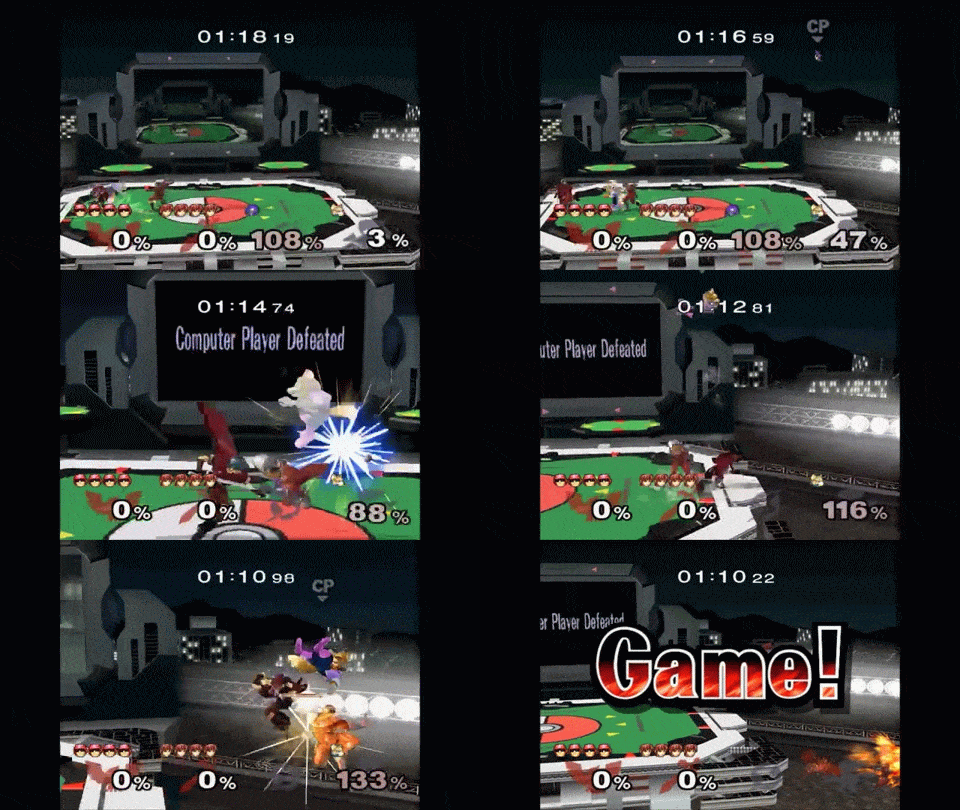
Here's my blog posts from MG Wiki about Sora, moved to the forums for your sake. The BasicsThe most basic information can be found on this page Flowmotion|here. I'm gonna talk about the things you can do as a whole with the move: * Flowdash * Flowcancel '''Flowdash:''' The flowdash is quite simple. You land with a downward angled Flowmotion, and boom, you have a mini pseudo wavedash. It's useful for crossing up your opponent, and landing mixups. You can also use this move to fake-out, including using it to slide forward into a combo move/kill move. If you land and collide with your opponent as you land, your opponent will get popped into the air. This is known to Sora mains as a ''Flowshot''. Unfortunately, the only thing it's useful is for a get-off-me option, as well as being for is styling. Flowdash is at it's most useful when recovering high. If you have options to land on platforms, you can flowdash onto them. This gives Sora a safer landing option when recovering high then he would normally have. '''Flowcancel:''' Flowcancelling is simply cancelling the original directional input and inputting a different direction. I will post a GIF of this later. Flowcancelling is what enables Sora's Flowmotion to meteor smash. By inputting an UFlow (Upward Flowmotion) then pressing down upon collision, Sora will do a rising DFlow (Downward Flowmotion Chain Attack), which will meteor smash opponents. The technique allows for situations that a normal Flowmotion can offer. An example list will be below: * Grounded Backwards Flowmotion * Meteor smashing Downwards Flowmotion * Any Flowmotion input going through shields. This last one can be done by starting a neutral flowmotion (don't press any keys) and then pressing a particular key. In the sequence as follows: Side + Special -> No keys pressed -> Directional Input pressed. This will lead to grounded versions of the moves that will be treated as command grabs, so they will go through shields, thus making them unblockable, which makes this a safer approach for Sora if the player connects the move. Chain attacks and uses.So, I will be covering the usefulness of the Flowmotion attacks in this section, but I'll start by giving an indicator of most useful to least useful Flowmotion: Most Useful: * Neutral Flowmotion * Backward Flowmotion * Downward/Upward Flowmotion * Forward Flowmotion Least Useful ^ So, I will start by covering each one in order, as always, details can be found Flowmotion|here. '''Neutral Flowmotion and Backward Flowmotion:''' There are two good things about these moves: They put you and your opponent in the air. They are command grabs. This means they get you a free aerial after execution, and they go through shields. Perfect. Both of these moves can 0-death combo off the top through consecutive use, however, Neutral Flowmotion is more reliable. Below is a list of all the characters this combo works on:                '''Downward/Upward Flowmotion:''' Both of these moves serve the same purpose, raw damage. Up-Flow can kill off the top in some stages, however these moves should be used for damage only. You can follow up from U-Flow with Up aerial, Forward aerial or Back aerial, whereas you can follow up D-Flow with Up aerial, Forward aerial, Neutral aerial or Down aerial. I mentioned before that DFlow meteor smashes, but it's generally impractical to use, and deals minimal knockback. '''Forward Flowmotion:''' This move really should only be used for recovery. It can follow up into Up aerial, Forward aerial, or Neutral aerial, but they aren't guaranteed as the move has a degree of lag. It does provide extra horizontal distance, which is beneficial for being offstage, but I wouldn't use this move too much. The lag leaves you open to attack afterwards in some cases and can sometimes lead you to go offstage with this move, which isn't favourable. On a weird note, flowcancelling a neutral input backwards can sometimes lead to a forward flowmotion that goes the opposite way to when you first attacked. It really only exists for style points or...something. It usually happens accidentally. == Shorthand notation for Flowmotion techniques: == *(N/F/B/U/D)-Flow = (Neutral/Forward/Backward/Up/Down) Flowmotion *NFC(F/B/U/D) = Neutral Flowcancelled (Forward/Back/Up/Down) (The thing that makes Flowmotion attacks count as grabs) *XFCY - X Flowcancelled Y Note that X is (N/F/B/U/D) and Y is (F/B/U/D) because you cannot Flowcancel into N-Flow. Thundaga
Thundaga is one of Soras least used moves for many Sora mains.. The start-up, and cool down time of the move, as well as its limited KO power, make it a tool that few Sora mains tend to rely upon. That being said, Thundaga has got two main uses, which I will go over.
As always, basic information about the move can be found Thundaga.
Lets start off with a brief list regarding the uses:
* Recovery
* Defence against projectiles.
Now, for the explanation:
Recovery:
Thundaga works well as a recovery option for the following reason: It drastically slows down your vertical and horizontal momentum when you use it, sometimes even completely cancelling it. This works especially well whilst recovering for a few reasons:
* It allows you to survive for longer and for higher percents
* It can let you get into a better position to use Finishing Leap to recover.
* Whilst limited in terms of size, the hitbox can help potentially Guard break edgeguarding characters, furthering your chances offstage.
This is a boon to Sora offstage, as you can usually use this straight out of hitstun, so you can survive for longer. Considering Sora's weight and falling speed, his general survivability is poor, so this helps.
There are a few downsides:
* It can get very predictable.
* Because it only slows down momentum instead of outright cancelling it, it is possible for knockback to be too powerful for Thundaga to work.
* Against any character who can competently edgeguard (e.g. Meta Knight (Super Smash Flash 2)|Meta Knight), the start up time of the move renders it useless.
* It doesnt work well with Meteor smashes, so you're better off Meteor cancelling them.
All in all, its a solid offstage option, but it relies on your opponent being a weaker edgeguarder/a character who cant effectively punish the move.
Speaking of edgeguarding...
Defence against projectiles:
Thundaga has a surprising amount of priority, meaning he can effectively deal with certain characters with projectiles, both onstage and offstage, however the former is generally riskier due to the nature of this move. It works on almost every character, save for a few that it is best advised not to try it on:
* Getsuga Tensho - The projectile is easy enough to powershield. In this matchup, powershielding this can really benefit you in getting an opening on Ichigo, so just do that instead. In the air, airdodging is just better, and taking the hit offstage may just be the best thing if you Directional influence|SDI out of it.
* Bomb (Bomberman) - The Bomberman (Super Smash Flash 2)|Bomberman player will almost certainly detonate this on you. Thundaga hits a set distance away, therefore it will be utterly useless. Powershielding/Airdodging is your best option usually, though be wary that the bombs have the potential to break shields.
* Dins Fire - This will move fast enough for the Zelda (Super Smash Flash 2)|Zelda player to steer it out of the way of your Thundaga. Just powershield/airdodge.
* Link (Super Smash Flash 2)|Link - Im including Link on here as a whole because his projectiles can really mess things up. Heros Bow and Bomb (Link)|Bomb arrows will almost certainly will be going fast enough to cause some serious problems. Its best trying to avoid these.
* Needle Storm - Very fast projectiles. These just aren't worth risking trying to Thundaga simply because you need to be looking for an opening. Avoid them if you can.
Aside from those, it can really help on some characters. I should note to you, that if a projectiles priority is equivalent to Thundagas, Sora will be left very open, so please keep that in mind.
Offensive Use:
Bonus section! +1
I'm gonna throw a quick point about using this move offensively. It does mostly vertical knockback, although it can go a bit horizontal sometimes. Its KO power is unreliable at best and you're just better off sticking to moves like Forward smash, Forward aerial, and Up smash. Its Sor'as 4th best KO move, however its also one of his most unreliable KO moves. Unless your opponent messes up their DI, spamming it shouldn't work, (although I have known this to be a bad habit of many Sora players, myself included), and in general, offensively using this move is discouraged.
As you can see, it can be very risky to use onstage and offstage depending on the matchup, but its still a useful tool. As you can see, from the varied levels of usefulness the move has to offer, both aspiring Sora mains, and experienced Sora mains will need to tread carefully with this move. Strike Raid
Strike Raid is Sora's neutral special in SSF2. It's also his worst special move. Well, it's his worst special move if you do these two things:
* Mindlessly spam it in neutral or in the air
* Forget/don't bother to cancel it.
I can appreciate you staring at this page and thinking "You can cancel it? Cool!", but I'll explain that later. For now, let's focus on the basics:
The move does offer a good reward for connecting with it. Here's why:
* It does good damage
* You can usually follow up with an Up smash, which is Sora's best KO move.
* Damage aside, this can also slow your vertical momentum down, so it slightly aides recovery.
However there is a very long list of drawbacks to the move:
Anything I note with a * is something that can be alleviated by cancelling.
* It has awful range.
* It has low Priority
* Windboxes can kill you by blowing you offstage whilst you're using the move.*
* It leaves you open, even without an opponent's superior priority.*
The list goes on...
Thankfully, Strike Raid Cancelling is pretty easy to do, which incidentally brings me to...
Strike Raid Cancelling/Raid Cancelling
'Shout-outs to Mr. Z for discovering this.'
Raid Cancelling is literally cancelling the throwing animation into Sora's idle animation, meaning he can quite literally walk out of the move. It's very simple to do. Here's a two step guide to it:
1. Use a back air out of anything 'except' a short hop.
2. Use Strike Raid before landing.
If done correctly, congratulations. You have made Strike Raid more useful.
It solves these problems:
* Vulnerability
* Death by windbox.
It also assists you by giving you one amazing thing. Free Followups.
If you've done a Raid Cancel properly, then you should be able to set up a combo into literally any move. However, here are some useful examples of moves you can follow up into:
* Forward smash/Up smash - Kill moves
* Flowmotion/Down smash - Raw damage
* Down aerial (Super Smash Flash 2)Down air/Down tilt/Finishing Leap - Combo starters.
Above all, the amazing thing it does is make Strike Raid competitively usable. However, it's still not a bread and butter move. Spamming it will still get you punished and it can get very predictable. The best time to use this is out of a Reverse aerial rush, as will be facing the other way when landing and you can use it for mixups if your opponent rolls away from you.
And, that's really all I can say about the move. This installment was much shorter than my previous ones, so, maybe you'll enjoy reading it more. Apologies this took so long. I've had a lot on... Finishing Leap:This is easily Sora's best special move. For a few reasons: - You can use it twice from the ground.
- It doesn't leave you helpless, so you can extend combos without the need to land.
- You can cancel it at any point in the move into an aerial.
- You can use it as a combo starter and a combo breaker, because it's surprisingly fast.
It also has a reverse hitbox, which is useful if you want to guarantee back airs off of this move. With this property, you can get some rather high damage true combos off a jab reset. For instance: Jab - Reverse Up-B -> Bair -> Uair -> Up-B -> Fair. This is a guaranteed 57%. Because of UAir's properties when falling, you could in theory string another UAir when falling to extend the combo. Additionally, were you to land the reverse hitbox again, you would be able to potentially extend this to 77% if you land the moves perfectly. This is slightly more effective on larger characters, which is useful for you, because many of your worst matchups are these larger heavier characters. Finishing Leap's property of cancelling into an aerial, much like Lloyd's Tiger Blade, make it a good combo starter. Often you can get a surprisingly good amount of damage just from an Up-B aerial. The percentages are as follows: Up-B -> Nair = 15% Up-B -> Fair = 23% Up-B -> Bair = 25% Up-B -> UAir = 15% Up-B -> Dair = 15% Bear in mind, that because many of Sora's aerials also link, you can further this damage output, adding a Fair to a Dair/UAir/Nair will up the damage to 29%. Fair after Bair can do 39%. Double Bair can do 41%. The list goes on. Because of it's relatively fast startup, Sora can use this to get out of combos, and start his own. However there's one major disadvantage: If you're by the edge, misinputting the direction can be fatal.  However, it's easily Sora's most reliable method of breaking combos, which he desperately needs of he wants to change the momentum of the match to himself once again. The fact that it leads into any aerial is icing on the cake. _________________Follow me on Twitter here.Youtube channel.  Click to expand thumbnail
SSF2 Backroom Character Analyst and Labber Mains: :lucario: 
Last edited by TSF.Strife on Mon Jun 19, 2017 8:52 am, edited 3 times in total.
|
| Fri Nov 13, 2015 4:10 pm |
|
 |
|
MaskedShadow
Joined: Thu Sep 03, 2015 6:26 pm Posts: 1224 Location: Indianapolis , IN Country:  Gender:
 Male
MGN Username: MaskedShadow2017
Currently Playing: the game called "the struggle of life."
Waifu: Don't need one.

|
 |  |  |  | DSwift wrote: Here's my blog posts from MG Wiki about Sora, moved to the forums for your sake. The BasicsThe most basic information can be found on this page Flowmotion|here. I'm gonna talk about the things you can do as a whole with the move: * Flowdash * Flowcancel '''Flowdash:''' The flowdash is quite simple. You land with a downward angled Flowmotion, and boom, you have a mini pseudo wavedash. It's useful for crossing up your opponent, and landing mixups. You can also use this move to fake-out, including using it to slide forward into a combo move/kill move. If you land and collide with your opponent as you land, your opponent will get popped into the air. This is known to Sora mains as a ''Flowshot''. Unfortunately, the only thing it's useful is for a get-off-me option, as well as being for is styling. Flowdash is at it's most useful when recovering high. If you have options to land on platforms, you can flowdash onto them. This gives Sora a safer landing option when recovering high then he would normally have. '''Flowcancel:''' Flowcancelling is simply cancelling the original directional input and inputting a different direction. I will post a GIF of this later. Flowcancelling is what enables Sora's Flowmotion to meteor smash. By inputting an UFlow (Upward Flowmotion) then pressing down upon collision, Sora will do a rising DFlow (Downward Flowmotion Chain Attack), which will meteor smash opponents. The technique allows for situations that a normal Flowmotion can offer. An example list will be below: * Grounded Backwards Flowmotion * Meteor smashing Downwards Flowmotion * Any Flowmotion input going through shields. This last one can be done by starting a neutral flowmotion (don't press any keys) and then pressing a particular key. In the sequence as follows: Side + Special -> No keys pressed -> Directional Input pressed. This will lead to grounded versions of the moves that will be treated as command grabs, so they will go through shields, thus making them unblockable, which makes this a safer approach for Sora if the player connects the move. Chain attacks and uses.So, I will be covering the usefulness of the Flowmotion attacks in this section, but I'll start by giving an indicator of most useful to least useful Flowmotion: Most Useful: * Neutral Flowmotion * Backward Flowmotion * Downward/Upward Flowmotion * Forward Flowmotion Least Useful ^ So, I will start by covering each one in order, as always, details can be found Flowmotion|here. '''Neutral Flowmotion and Backward Flowmotion:''' There are two good things about these moves: They put you and your opponent in the air. They are command grabs. This means they get you a free aerial after execution, and they go through shields. Perfect. Both of these moves can 0-death combo off the top through consecutive use, however, Neutral Flowmotion is more reliable. Below is a list of all the characters this combo works on:                '''Downward/Upward Flowmotion:''' Both of these moves serve the same purpose, raw damage. Up-Flow can kill off the top in some stages, however these moves should be used for damage only. You can follow up from U-Flow with Up aerial, Forward aerial or Back aerial, whereas you can follow up D-Flow with Up aerial, Forward aerial, Neutral aerial or Down aerial. I mentioned before that DFlow meteor smashes, but it's generally impractical to use, and deals minimal knockback. '''Forward Flowmotion:''' This move really should only be used for recovery. It can follow up into Up aerial, Forward aerial, or Neutral aerial, but they aren't guaranteed as the move has a degree of lag. It does provide extra horizontal distance, which is beneficial for being offstage, but I wouldn't use this move too much. The lag leaves you open to attack afterwards in some cases and can sometimes lead you to go offstage with this move, which isn't favourable. On a weird note, flowcancelling a neutral input backwards can sometimes lead to a forward flowmotion that goes the opposite way to when you first attacked. It really only exists for style points or...something. It usually happens accidentally. == Shorthand notation for Flowmotion techniques: == *(N/F/B/U/D)-Flow = (Neutral/Forward/Backward/Up/Down) Flowmotion *NFC(F/B/U/D) = Neutral Flowcancelled (Forward/Back/Up/Down) (The thing that makes Flowmotion attacks count as grabs) *XFCY - X Flowcancelled Y Note that X is (N/F/B/U/D) and Y is (F/B/U/D) because you cannot Flowcancel into N-Flow. Thundaga
Thundaga is one of Soras least used moves for many Sora mains.. The start-up, and cool down time of the move, as well as its limited KO power, make it a tool that few Sora mains tend to rely upon. That being said, Thundaga has got two main uses, which I will go over.
As always, basic information about the move can be found Thundaga.
Lets start off with a brief list regarding the uses:
* Recovery
* Defence against projectiles.
Now, for the explanation:
Recovery:
Thundaga works well as a recovery option for the following reason: It drastically slows down your vertical and horizontal momentum when you use it, sometimes even completely cancelling it. This works especially well whilst recovering for a few reasons:
* It allows you to survive for longer and for higher percents
* It can let you get into a better position to use Finishing Leap to recover.
* Whilst limited in terms of size, the hitbox can help potentially Guard break edgeguarding characters, furthering your chances offstage.
This is a boon to Sora offstage, as you can usually use this straight out of hitstun, so you can survive for longer. Considering Sora's weight and falling speed, his general survivability is poor, so this helps.
There are a few downsides:
* It can get very predictable.
* Because it only slows down momentum instead of outright cancelling it, it is possible for knockback to be too powerful for Thundaga to work.
* Against any character who can competently edgeguard (e.g. Meta Knight (Super Smash Flash 2)|Meta Knight), the start up time of the move renders it useless.
* It doesnt work well with Meteor smashes, so you're better off Meteor cancelling them.
All in all, its a solid offstage option, but it relies on your opponent being a weaker edgeguarder/a character who cant effectively punish the move.
Speaking of edgeguarding...
Defence against projectiles:
Thundaga has a surprising amount of priority, meaning he can effectively deal with certain characters with projectiles, both onstage and offstage, however the former is generally riskier due to the nature of this move. It works on almost every character, save for a few that it is best advised not to try it on:
* Getsuga Tensho - The projectile is easy enough to powershield. In this matchup, powershielding this can really benefit you in getting an opening on Ichigo, so just do that instead. In the air, airdodging is just better, and taking the hit offstage may just be the best thing if you Directional influence|SDI out of it.
* Bomb (Bomberman) - The Bomberman (Super Smash Flash 2)|Bomberman player will almost certainly detonate this on you. Thundaga hits a set distance away, therefore it will be utterly useless. Powershielding/Airdodging is your best option usually, though be wary that the bombs have the potential to break shields.
* Dins Fire - This will move fast enough for the Zelda (Super Smash Flash 2)|Zelda player to steer it out of the way of your Thundaga. Just powershield/airdodge.
* Link (Super Smash Flash 2)|Link - Im including Link on here as a whole because his projectiles can really mess things up. Heros Bow and Bomb (Link)|Bomb arrows will almost certainly will be going fast enough to cause some serious problems. Its best trying to avoid these.
* Needle Storm - Very fast projectiles. These just aren't worth risking trying to Thundaga simply because you need to be looking for an opening. Avoid them if you can.
Aside from those, it can really help on some characters. I should note to you, that if a projectiles priority is equivalent to Thundagas, Sora will be left very open, so please keep that in mind.
Offensive Use:
Bonus section! +1
I'm gonna throw a quick point about using this move offensively. It does mostly vertical knockback, although it can go a bit horizontal sometimes. Its KO power is unreliable at best and you're just better off sticking to moves like Forward smash, Forward aerial, and Up smash. Its Sor'as 4th best KO move, however its also one of his most unreliable KO moves. Unless your opponent messes up their DI, spamming it shouldn't work, (although I have known this to be a bad habit of many Sora players, myself included), and in general, offensively using this move is discouraged.
As you can see, it can be very risky to use onstage and offstage depending on the matchup, but its still a useful tool. As you can see, from the varied levels of usefulness the move has to offer, both aspiring Sora mains, and experienced Sora mains will need to tread carefully with this move. Strike Raid
Strike Raid is Sora's neutral special in SSF2. It's also his worst special move. Well, it's his worst special move if you do these two things:
* Mindlessly spam it in neutral or in the air
* Forget/don't bother to cancel it.
I can appreciate you staring at this page and thinking "You can cancel it? Cool!", but I'll explain that later. For now, let's focus on the basics:
The move does offer a good reward for connecting with it. Here's why:
* It does good damage
* You can usually follow up with an Up smash, which is Sora's best KO move.
* Damage aside, this can also slow your vertical momentum down, so it slightly aides recovery.
However there is a very long list of drawbacks to the move:
Anything I note with a * is something that can be alleviated by cancelling.
* It has awful range.
* It has low Priority
* Windboxes can kill you by blowing you offstage whilst you're using the move.*
* It leaves you open, even without an opponent's superior priority.*
The list goes on...
Thankfully, Strike Raid Cancelling is pretty easy to do, which incidentally brings me to...
Strike Raid Cancelling/Raid Cancelling
'Shout-outs to Mr. Z for discovering this.'
Raid Cancelling is literally cancelling the throwing animation into Sora's idle animation, meaning he can quite literally walk out of the move. It's very simple to do. Here's a two step guide to it:
1. Use a back air out of anything 'except' a short hop.
2. Use Strike Raid before landing.
If done correctly, congratulations. You have made Strike Raid more useful.
It solves these problems:
* Vulnerability
* Death by windbox.
It also assists you by giving you one amazing thing. Free Followups.
If you've done a Raid Cancel properly, then you should be able to set up a combo into literally any move. However, here are some useful examples of moves you can follow up into:
* Forward smash/Up smash - Kill moves
* Flowmotion/Down smash - Raw damage
* Down aerial (Super Smash Flash 2)Down air/Down tilt/Finishing Leap - Combo starters.
Above all, the amazing thing it does is make Strike Raid competitively usable. However, it's still not a bread and butter move. Spamming it will still get you punished and it can get very predictable. The best time to use this is out of a Reverse aerial rush, as will be facing the other way when landing and you can use it for mixups if your opponent rolls away from you.
And, that's really all I can say about the move. This installment was much shorter than my previous ones, so, maybe you'll enjoy reading it more. |  |  |  |  |
 Uh...Okay?
|
| Thu Nov 19, 2015 5:00 am |
|
|
Who is online |
Users browsing this forum: No registered users and 1 guest |
|
You cannot post new topics in this forum
You cannot reply to topics in this forum
You cannot edit your posts in this forum
You cannot delete your posts in this forum
You cannot post attachments in this forum
|

|



 (Sent too low)
 (Sent too high)
 (Sent too low)
 (Sent too low)
 (Sent too high)
 (Sent too high)
 (Sent too low)
 (Sent too low)
 (Sent too high)
 (Sent too high)
 (Sent too low)
 (Sent too high)
 (Sent too low)
 (Sent too low)

 if the direction of the Flowmotion is changed (i.e. Use it left, then right, etc.)


 //
//

 and
and 


