| View unanswered posts | View active topics |
It is currently Thu May 14, 2020 8:09 pm |
|
All times are UTC - 5 hours |
"Expansion" Character Moveset Speculation
Moderator: tson
| Page 13 of 46 |
[ 689 posts ] | Go to page Previous 1 ... 10, 11, 12, 13, 14, 15, 16 ... 46 Next |
"Expansion" Character Moveset Speculation
| Author | Message | ||||||||||||||||||||||||||||||||||||
|---|---|---|---|---|---|---|---|---|---|---|---|---|---|---|---|---|---|---|---|---|---|---|---|---|---|---|---|---|---|---|---|---|---|---|---|---|---|
|
Joined: Thu Nov 13, 2014 9:56 pm Posts: 791 Location: California Country: ")
Gender: Male MGN Username: Ganondoof Skype: ganondoof1 Currently Playing: Vanguard Princess, Upkmnfg, YGOPRO |
Man I really would like to post my own Waluigi moveset but that's against the rules. Ah well.
_________________  |
||||||||||||||||||||||||||||||||||||
| Tue Feb 10, 2015 11:00 am |
|
||||||||||||||||||||||||||||||||||||
|
BR Member  Joined: Fri Sep 26, 2014 1:33 pm Posts: 2002 Country: ")
Gender: Male MGN Username: TSF|Cookies Currently Playing: PM, Melee, Ultimate, Hollow Knight |
I think it wouldnt be that bad if you put it in... Maybe "hide" it as another character?
BTW, I edited myhttp://forums.mcleodgaming.com/viewtopic.php?f=96&t=39656&start=120Toad moveset pretty hard, if anyone wants to read and give some feedback as well _________________ Join Team Star Flash!  Shoutouts to Harr for this sick player card! Join Chibi Nation, the 20CR Discord for all aspiring Chibi-Robo mains!  Click to expand thumbnail |
||||||||||||||||||||||||||||||||||||
| Tue Feb 10, 2015 11:05 am |
|
||||||||||||||||||||||||||||||||||||
|
Joined: Thu Nov 13, 2014 9:56 pm Posts: 791 Location: California Country:
Gender: Male MGN Username: Ganondoof Skype: ganondoof1 Currently Playing: Vanguard Princess, Upkmnfg, YGOPRO |
The one I worked on has a completely different moveset. Instead of using his legs for most of his moves he has a weapon (racket) and tons of his moves are references to many Mario spinoff games. I managed to fit them all in one moveset pretty well in my opinion.
But since it is Waluigi, I don't think any of us wanna see 3 movesets of the same character going on. _________________ |
||||||||||||||||||||||||||||||||||||
| Tue Feb 10, 2015 11:15 am |
|
||||||||||||||||||||||||||||||||||||
|
BR Member  Joined: Fri Oct 17, 2014 7:10 pm Posts: 1078 Location: joey Country: ")
Gender: Male MGN Username: joey Skype: joey Currently Playing: joey Waifu: joey |
I prefer your waluigi move set more than any other waluigi moveset out there. Seriously if anyone hasen't seen it yet, I'd say give it a look. You won't be disappointed. _________________  |
||||||||||||||||||||||||||||||||||||
| Tue Feb 10, 2015 1:47 pm |
|
||||||||||||||||||||||||||||||||||||
|
Joined: Thu Nov 13, 2014 9:56 pm Posts: 791 Location: California Country:
Gender: Male MGN Username: Ganondoof Skype: ganondoof1 Currently Playing: Vanguard Princess, Upkmnfg, YGOPRO |
[Screw it]
-Overview- Waluigi is a tall hybrid disjoint character; most of his moves have disjoint hitboxes. He is midweight. Waluigi’s attributes from the spin-off games are sort of implemented in his playstyle; lots of long-ranged spacing and stage-controlling moves, but lower-than-average power and speed. His moveset is consisted of many references to many spin-off games in the Mario series. Waluigi is considered a Mario representative, despite close relationships with Wario. -Stats- Weight: Medium Height: Tall Walk Speed: Slow Dash Speed: Mid Run Speed: Slow Ground Jump: High Midair Jump: Medium Fall Speed: Slow Fastfall Speed: Mid Air Speed/Mobility: Medium/Mid - Fast/High Jab: One-Two (Game & Watch Gallery 4) Waluigi jabs with his elbow, then follows up with a low kick. First hit has low base knockback with low knockback scaling that deals 2%, and the knockback trajectory is straight up. Second hit has low base knockback with mid knockback scaling that deals 3%, and knockback trajectory is forward. Dash Attack: Striker Tackle (Super Mario Strikers, Mario Strikers Charged) Waluigi slams ahead of him. Striker Tackle has mid base knockback with high knockback scaling that deals 9%, and the knockback trajectory is diagonally forwards and slightly upwards. Getup Attack: Racket Twirl Waluigi holds his racket out and twirls around on the floor; his racket sweeping both of his sides. Racket Twirl has mid base knockback with low knockback scaling that deals 6%, and the knockback trajectory is forwards or backwards. Edge-Getup Attack: [Unfinished] Forward Tilt: Slice and Dice (Mario Tennis, Mario Power Tennis, Mario Tennis Open) Waluigi swings his racket in front of him in a slicing fashion. Waluigi can follow up the first hit with another slice by pressing the Normal Attack button a second time. Slice and Dice’s first hit has low base knockback with low knockback scaling that deals 4%, and the knockback trajectory is diagonally up and forward. The second hit has mid base knockback with low knockback scaling that deals 4%, and the knockback trajectory is diagonally up and forward. Up Tilt: Lob (Mario Tennis, Mario Power Tennis, Mario Tennis Open) Waluigi swings his racket overhead in a lobbing fashion. Lob has mid base knockback with low knockback scaling that deals 8%, and the knockback trajectory is upwards. Down Tilt: Drop (Mario Tennis, Mario Power Tennis, Mario Tennis Open) Waluigi swings his racket along the ground in a sweeping fashion. Drop has low base knockback with high knockback scaling that deals 6%, and the knockback trajectory is down. Forward Smash: Striker Kick (Super Mario Strikers, Mario Strikers Charged) Waluigi brings his leg back, then swiftly kicks forward. The charging animation is Waluigi prepping his leg. Waluigi's boot is the sweetspot, while the rest of Waluigi's leg is the sourspot. Striker Kick's sweetspot has high base knockback with mid knockback scaling that deals a minimum of 15% (uncharged) up to a maximum of 25% (fully charged), and the knockback trajectory is forward. Striker Kick's sourspot has low base knockback with low knockback scaling that deals a minimum of 9% (uncharged) up to a maximum of 14% (fully charged), and the knockback trajectory is forward. Down Smash: Hex (Mario Party DS) Waluigi pulls out a hexagonal party space and slams it into the ground. The charging animation is Waluigi raising the object high above his head. Once Hex is planted, it expands and becomes active a second later, beginning to produce electric sparks around it. Anyone (including Waluigi) that stands on Hex will be affected. Hex has high base knockback with low knockback scaling that deals 10%, and the knockback trajectory is upward. Hex lasts from 3 seconds (uncharged) to 9 seconds (fully charged). Up Smash: Fake Item Box (Mario Kart series) Waluigi pulls out a fake item box and tosses it directly above him. The charging animation is Waluigi looking up and c*** his throwing arm back. After execution, the fake item box quickly ascends up, and falls back down after reaching its apex. Fake Item Box stuns foes for 1 second upon impact. If Waluigi misses, the Fake Item Box will land on his head and cause some endlag. Fake Item Box deals a minimum of 12% (uncharged) up to a maximum of 16% (fully charged), and the knockback trajectory is upwards. Standard Aerial Attack: Whirluigi (Mario Power Tennis) Waluigi holds his racket in front of him and spins around while a cyclone forms around his body. The ending hit has more power. Whirluigi's multihits have low base knockback and low knockback scaling that deals 1%, and the knockback trajectory is diagonally upwards and either forwards or backwards. Whirluigi's ending hit has mid base knockback and mid knockback scaling that deals 4%, and the knockback trajectory is either forward or backward. Forward Aerial Attack: Smash (Mario Tennis, Mario Power Tennis, Mario Tennis Open) Waluigi swings his racket in a smashing fashion. Smash has mid-high base knockback and high knockback scaling that deals 14%, and the knockback trajectory is diagonally upward and forward. Backward Aerial Attack: Reverse Kick Waluigi spins around and swings his leg out. Reverse Kick has mid base knockback and high knockback scaling that deals 9%, and the knockback trajectory is backward. Upward Aerial Attack: Blooper Hat (Mario series) A Blooper hiding in Waluigi’s hat suddenly sprays ink above Waluigi’s head, and the hat is raised along with the ink. Waluigi’s hat is a sweetspot, while the spraying ink is a sourspot. Blooper Hat’s sweetspot has mid base knockback and high knockback scaling that deals 14%, and the knockback trajectory is upwards. Blooper Hat’s sourspot has low base knockback and mid knockback scaling that deals 7%, and the knockback trajectory is upwards and either forward or backward. Downward Aerial Attack: Ground Pound (Mario series) Waluigi sticks his butt down and his trajectory is curved downwards, while momentum is unaffected. Waluigi will eventually end his animation if he is high enough. If Waluigi lands on the ground while performing this move, he will have considerable endlag. Ground Pound has mid base knockback with low knockback scaling that deals 5%, and the knockback trajectory is diagonally upwards and slightly forwards. Standard Special: Topspin Serve (Mario Tennis, Mario Power Tennis, Mario Tennis Open) Waluigi takes out a tennis ball and serves it across from him at an arc. The tennis ball will lose speed and power once it bounces, and disappears when it lands afterwards. Waluigi has to press the special button twice in order to serve the ball; the first input only preps Waluigi to toss the ball up, and depending on when the special button is inputted a 2nd time, the arc will change. If timed at the perfect spot, the ball will move really fast and move straight ahead instead of arc. If not timed perfectly, the ball does 8%-10% with low base knockback and low knockback scaling, and the knockback trajectory is diagonally upwards and forwards. When timed perfectly, the ball does 11%-13% with mid base knockback and mid knockback scaling, and the knockback trajectory is forward. The tennis ball when bounced has low base knockback with low knockback scaling that deals 2%, and the knockback trajectory is either forward or backward. Side Special: Swim (Mario Hoops 3 On 3, Mario Power Tennis) Waluigi starts swimming in the air in a single direction while bubbles surround him. There are no hitboxes when Waluigi uses this move. Waluigi can handle the move upwards and downwards after execution. Swim normally lasts 1.5 seconds, but Waluigi can cancel the move at anytime while it is in use with an aerial attack. Waluigi can slow down Swim by holding down the Special button. Waluigi can't jump or use special moves after Swim until he lands. Swim sweetspots the ledge when Waluigi gets close to it. Down Special: Glad Bob-omb (Super Princess Peach) Waluigi drops a Glad Bob-omb and the bob-omb starts walking on its own as soon as it lands. The bob-omb will explode, even while falling, when it comes in contact with a foe, projectile, or wall. The bob-omb will be able to destroy some projectiles. Waluigi can only have one Glad Bob-omb out at a time, and the cooldown after one explodes is 3 seconds. Glad Bob-omb's hitbox will have mid base knockback with low knockback scaling and deals 10%, and the knockback trajectory is either forwards or backwards. Up Special: Twister (Mario Sports Mix..?) Waluigi rapidly spins around as he ascends upwards, ending the move with a pose. The move is maneuverable in both left and right directions. The ascent is pretty slow, but the tradeoff is a lot more acceleration and handling in the move. The ascent has multiple hitboxes with very low base knockback and knockback scaling that deal 1% each, and the knockback trajectory is upwards. The ending pose has a hitbox with mid base knockback and mid knockback scaling that deals 5%, and the knockback trajectory is diagonally upwards and either forwards or backwards. Twister is able to sweetspot the edge before the ending pose. Grab: Single-handed Grab Waluigi reaches out and tries to grab his foe. Pummel: Knee Waluigi forcefully brings his knee up to his foe. Knee does 1% for each Pummel. Forward Throw: Slugger Swing (Mario Super Sluggers) Waluigi lightly tosses his opponent upwards, winds up his racket as if it is a baseball bat, and let’s them have it, knocking them away them with a purple trail of light behind them. Slugger Swing has high base knockback with high knockback scaling that deals 12%, and the knockback trajectory is diagonally forwards and slightly upwards. Backward Throw: Slugger Pitch (Mario Super Sluggers) Waluigi puts away his racket, twirls his foe around in his hand while holding them before pivoting and pitching them away. Afterwards he pulls his racket back out. Slugger Pitch has mid base knockback with mid knockback scaling that deals 8%, and the knockback trajectory is diagonally backwards and slightly upwards. Down Throw: Stomp (Super Smash Bros. Brawl, Super Smash Bros for WiiU and 3DS) Waluigi lays his foe down and starts stomping on them repeatedly until they get knocked back. Stomp has low base knockback with low knockback scaling that deals 8%, and the knockback trajectory is diagonally upwards and slightly forward. Up Throw: Party Block (Mario Party series) Waluigi tosses his foe upward, and suddenly a Party Block forms and the foe is trapped in it while a number reels. Waluigi then hits the block, breaking it and freeing his foe while sending them upwards. Party Block has low base knockback with low knockback scaling that deals from 1% to 10%, and the knockback trajectory is upwards. Standard Taunt: Crotch Chops (Super Mario Strikers, Mario Strikers Charged) Waluigi puts away his racket, jumps into position and starts crotch chopping, and afterwards he shakes while waving his arms in the air. Then Waluigi pulls his racket back out and reverts back to his idle animation. Downwards Taunt: Purple Gaze (Mario Tennis, Mario Tennis Open) Waluigi stares at the player and his eyes start glowing a bright purple. Then Waluigi’s eyes revert back and he reverts to his idle animation. Sideways Taunt: Upside-down L (Mario Sports Mix) Waluigi poses into the shape of his upside-down L, while a yellow upside-down L forms and covers his body. Then the L fades away and Waluigi reverts back to his idle animation. Final Smash: [Unfinished] _________________ |
||||||||||||||||||||||||||||||||||||
| Thu Feb 12, 2015 11:03 am |
|
||||||||||||||||||||||||||||||||||||
 Joined: Thu Jul 24, 2014 10:15 am Posts: 225 Location: Wherever the hell I wanna be. Country:
Gender: Male MGN Username: Vega Currently Playing: The Beta |
Marluxia, and here is what he would be like:
Character Name: Marluxia Nintendo Consoles They've Appeared in: Nintendo Gameboy Advance and Nintendo DS Nintendo Games They've Appeared in: Kingdom Hearts: Chain of Memories and Kingdom Hearts: 358/2 Days Playable Appearance: Kingdom Hearts: 358/2 Days Why Choose Him?: Marluxia would be an excellent and unique addition to the cast of the Smash Flash characters, plus, we have yet to get a second Kingdom Hearts character; explanation of how unique he would be would be below. Attributes: Weight Type: Heavyweight Weight Number: 108 Size: Large (taller than Samus) Falling Type: Semi-Floaty (as floaty as Zelda) Air Speed: Fast (as fast as Wario) Walking Speed: Slow (as slow as Link) Dashing Speed: Very Fast (almost as fast as Fox) Jumping Ability: 3 Jumps Jumping Height: Medium Range: Long Attack Speed: Fast Projectile User: Yes Moveset: Alright, time for the moveset that I think could fit him very, very well. Marluxia is a character who wields a scythe, and can swing it at an incredibly fast pace, and is a combo heavy character as well. As such, he will have long ranged and fast attacks, at the expense of some power to balance him out. Knockback will be categorized as follows: Set: Will always have the same knockback, no matter what damage. Very Low: Little to no knockback. Low: Little knockback. Moderate: Average amount of knockback. High: Immense amount of knockback. Heavy: Very deadly amount of knockback, can KO very early. OHKO: Basically, anything with this will OHKO if it's not tech'd or if the opponent hits too many walls. Here's his moveset in full that could fit him: Jab Combo: Marluxia swings his scythe four times; twice horizontally, once upward in an arc and finishing off with a slam. The first swing deals 2% damage, the second dealing 2%, the arc swing dealing 2% damage and the slam dealing 3% damage. The arc swing has low vertical knockback that leads up into the slam, while the slam has low-moderate horizontal knockback. Forward Tilt: Marluxia swings his scythe forward in an arc, not unlike the slam finisher from the jab combo. This attack goes much slower, and deals around 11% damage with moderate diagonal knockback. Dash Attack: Marluxia twirls around and slashes his scythe horizontally, creating a burst right in front of it. The attack deals 14% damage with high horizontal knockback, comparable to a Smash Attack. There is an added effect to this attack that allows Marluxia to actually be able to jump off edges/ledges to attack, giving it high edge-guard abilities. Down Tilt: Marluxia swings his scythe low in a quick hit. The attack deals 7% damage, and will meteor at the tip of the attack. If the tip doesn't hit, then the opponent is hit horizontally, while the tip will send them up if they aren't above. Up Tilt: Marluxia will bring his scythe up and hold it for a short amount of time before slamming it down forcefully. The attack deals 16% damage with high knockback, but at the expense of speed. Forward Smash: Marluxia spins forward and slashes his scythe with brute force. The attack deals 15% damage uncharged, and can fully charge to deal 22% damage, with the attack having heavy knockback at the expense of speed. Down Smash: Marluxia spins around quickly with his scythe and hits the opponent on both sides lowly. The frontal attack deals 14% damage uncharged, and up to 19% damage fully charged, while the back attack deals 11% uncharged and 15% fully charged. While the front has heavy vertical knockback, the back portion will semi-spike with moderate knockback. Up Smash: Marluxia will swing his scythe upwards thrice, at a very quick pace as well. The first attack deals 4% uncharged, 6% fully charged, second attack dealing 5% uncharged and 7% fully charged, and the last attack dealing 12% uncharged and 14% fully charged. The first two swings link up to the third swing, which has heavy vertical knockback. Neutral Aerial: Marluxia will twirl himself around with his scythe, only hitting forward. The front hit deals 10% damage with moderate knockback, while the back hit deals 11% damage with moderate knockback. Forward Aerial: Marluxia will spin his body 360 degrees clockwise in a wheel motion with his scythe, hitting in any direction once. The attack will deal 9% damage early with moderate knockback, but goes down to 4% damage late with low semi-spike knockback. Back Aerial: Marluxia will hit his opponent by swinging his scythe incredibly fast behind him. The attack will deal 14% damage with heavy knockback. Up Aerial: Marluxia will swing his scythe quickly upward in an arc. The attack will deal 13% damage with high knockback. Down Aerial: Marluxia will swing his scythe straight downward to hit his opponent from above. The base of the scythe will deal 10% damage with moderate horizontal knockback, while the head of the scythe will deal 14% damage and is capable of meteor smashing the opponent. Neutral Special - Deathscythe: Marluxia raises his scythe for a little bit before shooting out a crescent-shaped projectile toward the opponent. The projectile deals 9% damage and low knockback, while the scythe portion will deal 10% damage with moderate knockback. It has two phases, one where the projectile will follow the opponent up until a certain angle, and the second where it will dart straight. Side Special - Phantom Saber: Marluxia will quickly dart forward and slash at his opponent with his scythe. The attack will deal 10% damage with low knockback. The attack will not leave Marluxia in a helpless state and he can use his secondary recovery move or another attack. Down Special - Flower Storm: Marluxia will send a storm of petals spinning around him in a short distance, which start to disappear as they get further away from him. At the start of the attack, they deal multiples of 2% damage around 7 times, while at the disperse, they will deal 3% damage with low knockback. Up Special - High Jump Glide: Marluxia will boost himself into the air quickly and attack the opponent with the resulting kick. The kick itself deals only 5% damage with low vertical knockback, but has an incredibly high recovery that leads into him floating for a couple seconds. Final Smash: Doom Doom is Marluxia's Final Smash, and once it activates, any and all opponents, no matter the distance, will be sent into a stun/dizzy state, in which they won't take any damage, but instead, the resulting slash from Marluxia's scythe will send them into an instant KO on the spot. The only way to dodge this attack is by dodging right as his eye shines, as it will slow down the time to give enough reaction. And that is Marluxia for expansion. Hope...you...liked this suggestion. _________________ MGN Username: Vega Mains:    Secondaries:    |
||||||||||||||||||||||||||||||||||||
| Mon Mar 16, 2015 5:54 pm |
|
||||||||||||||||||||||||||||||||||||
|
BR Member Joined: Fri Sep 26, 2014 1:33 pm Posts: 2002 Country:
Gender: Male MGN Username: TSF|Cookies Currently Playing: PM, Melee, Ultimate, Hollow Knight |
I hereby present... THE HERO OF LEGEND! Or just Classic Link for short... (TLoZ: ALttP, Oracle Games, Link´s Awakening)(Credit to Sonario for the idea)
 Click to expand thumbnail The Classic Hero from the past returns to take on new, mighty foes... Lets see how he can handle them! General stuff: The Hero of Legend wields the Golden Sword, the Mirror Shield, sports his overall ALttP appearance and comes to the fight with a variety of items to aid him in battle! The Mirror Shield will block projectiles just like the Hylian Shield, but has the abilitiy to reflect energy based projectiles as well. As you might expect from the incarnation of Link who has completed the most dungeons in overall, he is an experienced fighter who can adapt to almost every foe out there and keeps a cool head in pretty much every situation. Time for a new timeline! Entrance: Classic Link flies to the battlefield with the help of the bird from ALttP. Idle: Looks around bored, but keeps his Mirror Shield up. Size: A bit bigger than Mario, but smaller than normal Link. Weight: All that equipment sure is heavy (screw hammerspace), so assuming that Marios weight is 100, our hero has a weight of 115. Dash speed: Slower than regular Link, but not by that much. Still gets outspeeded by him tho. Walk speed: Mediocre. This in turn gives him high control of his positioning on the battlefield. Additional, Classic Link keeps his Mirror Shield up if he walks. Air speed: Meh. Not that good, but has good airial mobility in exchange. Uses Roc´s Feather to jump as an asthetic. Fall speed: High. Rolls: Classic Link uses the Cane of Byrna to make himself intangible and performs a quick roll for a short distance. Tech rolls go a bit further, but are slow in execution. Sidestep: The Hero of Legend becomes invisible with the help of his Magic Cape. Moveset: Jab1: A single left handed punch with Ricky´s Gloves, pushing victims away from Classic Link. 2% per hit. Jab2: Another jab with the Gloves. Slightly better range. 2% per hit. Jab3: An uppercut. Good vertical range and can kill at 140%+. 3% per hit. "Gentleman Jab": Holding A instead of pressing it repeatedly will result in Classic Link chargin hiw sword. Charge takes one second and allows the user to perform a Spin Attack with one spin, decent range, damage output and KO potential. 10% per hit. Reliably kills at the 110% mark. Dash Attack: The Hero of Legend stabs forward with his sword. Move comes with a piercing effect that has high damage on shields. 6% per hit. FTilt: The standart sword slash from his games. Quick with average KB. A good setup move. 5% per hit. UTilt: Attack using the Hyper Slingshot. Small hitbox, but low startup. Can be reflected. 7% per hit. DTilt: A crouching stab. Similar to BM´s DTilt, but with better range. 6% per hit. FSmash: Ether - The Ether medal grants Classic Link the power of the wind, freezing foes with a windbox added. Good range, fast to use and a good spacing tool. Hitbox only in front of Link, and the KB is underwhelming. 9-17% per hit. USmash: Bombos - The Bombos medal allows Classic Link to cast a barrage of fire above his head, dealing a powerful, but somewhat slow strike. Disjoint above the user´s head, but the vertical hitbox is almost nonextistant. 11-20% per hit. DSmash: Quake - Classic Link casts an earthquake via jumping and slamming his sord into the ground mid-air. Charge does not affect damage, but increases the range of the move. Can be avoided if jumped over, but near opponents will get hit if they arent high enough. 10% per hit. High endlag. Nair: Propably the stranges Nair youll ever see... The Hero of Legend pulls out his trusty Bow and fires an Arrow from it. Has the same startup as in the SNES game, travels rather slow and covers 1/2 of FD. Has about as much KB as regular Links uncharged arrow, but very Brawl hitstun. Deals 8% on hit. Every 10th time you use this move, the Arrow gets replaced witha Silver Arrow instead, dealing 15%, covering all of FD with insane speed and piercing properties, beinga ble to net the kill at 130% at the edge. Arrows are not affected by greavity and are prefect for gimping and spacing then Zair isnt enough. If you land on the ground during the startup, the Bow is released instantly with no lag at all. in the air, it autocancels, but has rather high endlag otherwise. Fair: Classic Link pulls out his Magic Hammer and winds up. Afterwards, he deals a powerful meteor smash by slamming it downwards with full force. Meteor is active on the second part of the hitbox, the first half delivers a potent blow with almost completely horizontal KB, allowing for some nice KO options. 13% per hit regardless of hitbox. Bair: Classic Link throws the Magic Boomerang behind him and pokes his victim. The boomerang has solid range and great gimp potential. Hitbox stays active when the Boomerang gets back to Classic Link, but sends foes the other way. 9% if thrown behind the user, and 2% if it returns. Autocancels. Can be reflected. UAir: The Hero of Legend uses his Magic Powder to hit foes above him. Great range and safe to use, but lacks in terms of power. 7% per hit. High endlag. Does not Autocancel. Instead, it has quite high endlag if landed afterwards. Dair: Classic Link attacks using his seed bomber to cover his return to the ground. Fast projectile with a bit startup, dealing up to 4 hits with 2% each. Last hit sends foes flying downwards and acts as an average Meteor. Leaves Classic Link highly vulnerable if he lands before the seed comes out. Can be refelected and/or SDI´ed out from. Zair: The Hookshot. (What did you expect?) Slighty shorter than regular Link´s Zair, but is faster to use and has higher poking effect. 5% per hit. Great spacing tool and autocancels. If Wall Tethering gets added, this move allows it. Neutral B: Pegasus Seeds - Classic Link stops his momentum for a brief moment and then dashes forward at SANIC SPEED! with his sword extended to hit enemies. Classic Link carries over his momentum off edges, but speed is halved mid-air. If he touches the ground whilst charging, he dashes forward instantly, but with a much slower pace. Sends hit oppents flying backwards. Moves with reflecting properties will turn Classic Link around and double his speed and power, turning this into a neat KO move and allowing for some nic(h)e usage in teams. 12% per hit. Side B: Fire Rod/Ice Rod - Classic Link uses his Fire Rod to burn his foes with a pillar of fire that travels slowly forward for a short distance with decent range and good KB, but falls off of platforms. Move deals 15% if it connects, but is slow in usage. After the first usage, this becomes the Ice Rod instead, creating an icy pillar that is not affected by gravity. This version of the move is much faster and has a 10% of freeezing foes. 7% per hit with good hitstun. Additional 5% if target gets frozen. Move cycles between Fire/Ice with each usage. Both rods can be reflected. Up B: Flute - Classic Link gets carried up by the ALttP bird. Basically a ripoff of Smash 4 MM´s Custom Up B Beat with a few twists however. For instance, the bird itself is a hitbox, has 15HP per use and can be scared to fly away, making Classic Link drop down, but his Double Jump is restored if he used it before. Attacking Link himself will enable him to recall the bird. He can also use his sword to defend himself with a quick slash that deals 6% and meteors. Travels the same distance as the original move, but is rather slow in travel speed. Can be cancelled by pressing down or airdodging. Does not deploy your Double Jump. Down B: Bombchu - Classic Link pulls a Bombchu Grab: Classic Link spins his Bug Catching Net in an attempt to catch an opponent with it. However, he spins around with this in a full circle, effectively making Classic Link the only character who can grab behind him as well. Frame data is ironically taken from Chibis Nair, thus letting this move have two grabboxes at the user´s front. If succesfull, CL will then hold his victim with the Titan´s Mitt. High endlag if it misses, but it is fast in startup and has ok spin speed. Pummel: Classic Link pulls out his Lamp and burns his victim. Really slow, but does 4% per hit. FThrow: An overhead throw. Angle can be adjusted slightly via Up/Down inputs. Sets up edgeguarding. 6% per hit. BThrow: Classic Link throws his foe behind him. KB is simlilar to FThrow without the angling. 8% per hit. UThrow: Classic Link throws up his enemy with one hand. Doesnt have much KB, but is useful for getting a string afterwards. 5% per hit. DThrow: Classic Link lays his foe down and. He then uses the Cane of Somaria to summon a huge block that drops on the victim. 12%. Insane KB that is purely horizontal. Kills as early as 75% if used at the ledge. The stone also damages other players in the way if there are some. Heaving the stone takes about as much time as Bowsers DThrow, so another person can knock CL out of this move with to prevent any harm. The victim itself lies on the floor in panic. Final Smash: Classic Link drops his Moon Pearl and transforms into his Bunny Link form. Whilst that, he desperatly chases after his item, slamming foes out of his way without even noticing. 17% on contact with a considerable amount of KB. Lasts for 15 seconds. After the time is up, he grabs the Pearl and transforms back to his regular self. (Surprise!) Regular/Side Taunt: The Hero of Legend poses like he collected an item and the typical Zelda Jingle plays. Up/Down Taunt: Classic Link throws his sword slightly upward, catches it and does a small pose afterwards. Winning animation: Does a few sword slashes in various directions, ending with a Spin Attack. Fanfare: SNES Dark World Theme. Nuff said. Losing animation: Looks down to the floor, but claps for the winner nonetheless. Thats it! Feel free to give feedback on this one. _________________ Join Team Star Flash! Shoutouts to Harr for this sick player card! Join Chibi Nation, the 20CR Discord for all aspiring Chibi-Robo mains! Click to expand thumbnail Last edited by TSF|Cookies on Tue Sep 01, 2015 12:58 pm, edited 3 times in total. |
||||||||||||||||||||||||||||||||||||
| Fri Apr 03, 2015 2:21 pm |
|
||||||||||||||||||||||||||||||||||||
|
BR Member Joined: Fri Sep 26, 2014 1:33 pm Posts: 2002 Country:
Gender: Male MGN Username: TSF|Cookies Currently Playing: PM, Melee, Ultimate, Hollow Knight |
Double post cuz this thread seems a bit deserted atm... Anyway, heres my next unlikely to impossible moveset!
PHANTOM (actually Toon Zelda in a Phantom Suit) Originated in The Legend of Zelda Phantom Hourglass, I chose the Spirit Tracks incarnation because it looks better imo. Moveset ideas come from both games however. And for this moveset, Phantom/Toon Zelda is a Torch phantom and has a fire sword, but can change form if required. 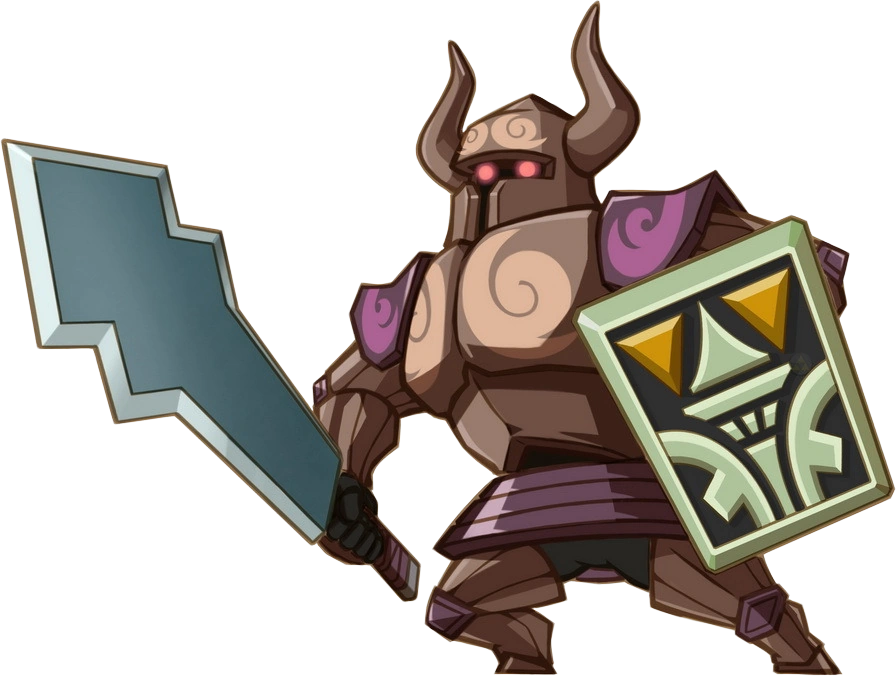 Some of you might be wodering "Why a goddamn Phantom?" Because this basically is Toon Zelda, and Toon Zelda seems to be a more or less requested character... General stats: Size: RosaLuma in the fat edition. Crouching doesnt help much, Toon Zelda still is big af. Weight: Assuming that Mario is 100, this fat pice of iron weighs 130 in total. All that armor sure is heavy... Jump height: SH is the lowest in the game, Fullhop is under the average. DJ however goes surprisingly high. Ground Speed: Slowest charcter in the game, walk speed is half the dash speed. Just awful. Air Movement: Air speed is hella slow, and the mobility isnt that much better. A sluggish character in almost everything. Fall speed falls shy behind Fox. Armor: The Phantom Armor grants Phantom Zelda the power to just walk (and only walk) through certain hazards. Hazard is everything that alters the regular ground in some way (e. g. Clone Mine) Moveset: Jab: A stab with the sword. Slow and burns foes. Slow. 4% per hit. FTilt: Phantom Toon Zelda pushes her shield in front of her to get space. Beats all projectiles and has some crazy priority. 7% per hit. Her fastest ground move. UTilt: A seing of the sword over her head. Insane reach and is a good combo starter, buthas tons of cooldown if missed. 6% per hit. DTilt: PTZ slashes her sword over the ground, giving good reach and some KB, but again, this move is sluggish. 6% per hit. Dash Attack: PTZ accidently trips over and crushes foes with her pure weith. Has two effects. The first one can bury foes and deals 7%, and the second one has some crazy KB with 9% as well. Effect is randomly chosen with a 50:50 chance. Hella startup and endlag tho. FSmash: PTZ winds up for a long startup and slams the sword down in front of her both-handed. Insane KB (and I mean really crazy), but the lag is real. 13-22% per hit. Shield gets stuffed to her back in the meantime. USmash: PTZ thrusts sword and shield upwards at the same time, providing protection of projectiles and attacking at the same time. The shield hits first with 5-10%, and then the sword strikes with some good KB and 7-12%. Fast, but has endlag you will notice. DSmash: Zelda thrusts out her weapons again, but this time on her sides. Sword hits in front of her, the shield covers her back. 8-17% per hit for the sword, and the shield does 5-14% on hit. Excellent range and her fastest smash. Sword has lower priority than the Shield. Nair: Zelda slowly swings her Torch Sword around her counterclockwise. Does one hit with 7% and average KB. Autocancels. Fair: A punch with the shield. Again, this stops all projetile-like attacks and has some high priority. Bair: A backward slash that turns Phantom Toon Zelda around. Great reach, good KB and being her fastest air move make this attack quite a threat. 8% per hit. UAir: Sword thrust upwards while spinning the sword. Multihitting move with juggling potential, but range is low for her standarts. 6% if all hits connect. Dair: PTZ turns into a Wrecker Phantom and activates her Rock Form, charshing down straight. Complete armor on the whole move, including startup. Sluggish as hell, but kills Floaties at 80%. If the victim gets hit during startup, they will get meteored hard. 9% per hit regardless of hitbox. Neutral B: Up B: Warp Phantom - Zelda turns into a Warp Phantom and, well, warps. Reach is about Palutena´s Warp in Smash 4. However, PTZ slashes her foe on re-appearing, being a nice surprise attack that does 6% with kill potential at higher %. After 10 uses, this move has a turns into Gold Phantom which doubles distance, and the slash bets replaced with an axe strike. Gold Phantom form deals 10% on hit with higher KB. Decide if you wanna use it for recovery or a stylish kill. Doesnt leave PTZ helpless if the attack connects, but neither DJ or Up B are restored. Side B: I TOLD YOU NOT TO HIT ME! - Zelda releases all her anger of betting beaten up in one powerful strike. Move deals 10% of all the damage Zelda has taken in the match this far. KB gets stacked nd then halfed once you release the move. Fearsome attack. Down B: Swift Phantom - PTZ doubles her speed (both ground and air), but halves her damge output, weigth and fall speed in exchange. This change stays active until Down B is used again. Final Smash: Phantom Frenzy - PTZ gets surrounded by rats. A lot of rats. You know what will happen now... Phantom Zelda runs around scared, running over everything and everyone in her way. Rats run around the screen randomly, stunning foes for 4 seconds. Zelda cannot be controlled and jumps randomly, but wont fall of platforms. The small Battlefield platforms and its relatives ignore this however. Taunt 1: Zelda poses for the audience. Taunt 2: Zelda flips her equipment a few times, before entering a battle stance that lets her swrod glow for a brief moment. Aaaaaand thats it. Propably even more unlikely than having Toon Link, Classic Link and Young Link together, but I still put it here. Feedback is allowed and approved _________________ Join Team Star Flash! Shoutouts to Harr for this sick player card! Join Chibi Nation, the 20CR Discord for all aspiring Chibi-Robo mains! Click to expand thumbnail |
||||||||||||||||||||||||||||||||||||
| Tue Apr 21, 2015 3:06 pm |
|
||||||||||||||||||||||||||||||||||||
|
BR Member Joined: Fri Sep 26, 2014 1:33 pm Posts: 2002 Country:
Gender: Male MGN Username: TSF|Cookies Currently Playing: PM, Melee, Ultimate, Hollow Knight |
Can someone post in here so I dont get a warning plz... Also this thread doesnt deserve death
Welp, since noone is doing s*** in this thread, Im just goona throw out another moveset... LUMA 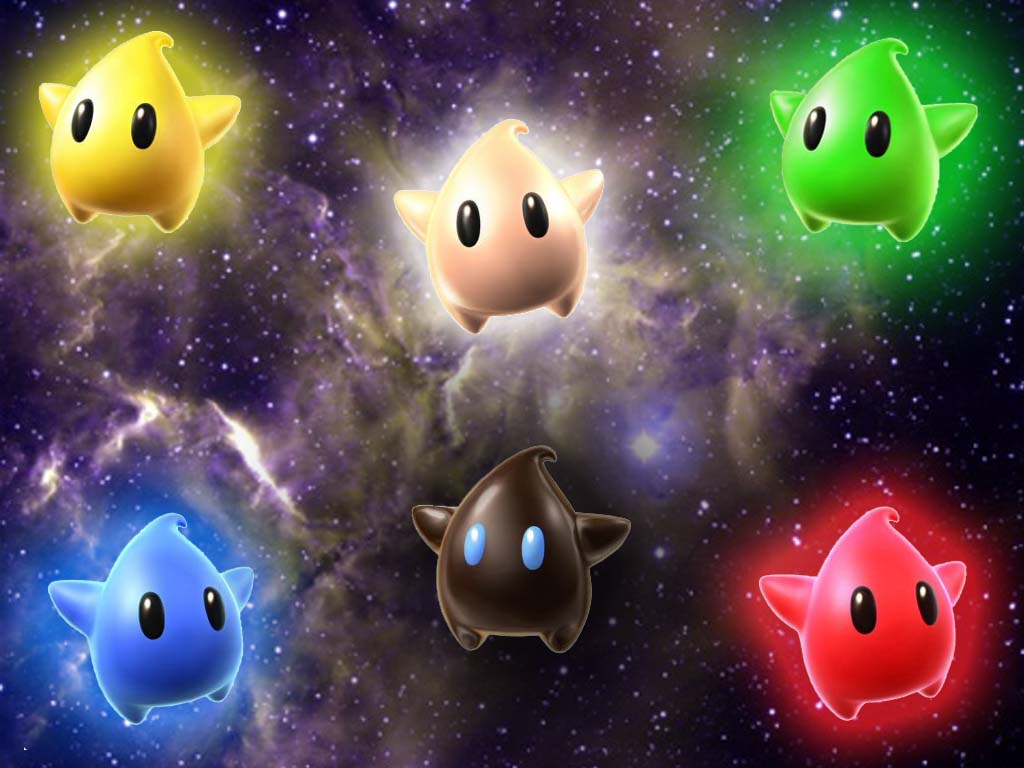 Those cute little pillow star like aliens debuted in Super Mario Galaxy, and since then have appeared in the sequel, SM3DW, Mario Kart Wii/8 (as a cameo) Mario Tennis Open and of course the new Super Smash Bros. for Wii U and Nintendo 3DS (the latter brought him alot of hate from whiny bad players...) AHEM! Luma uses mostly his body to fight (like he has options), but will pull out his tennis racket if required. Colour palettes would include (but not be reduced to) the coulours in the pic above. Unlike in SSB4, his damage output and KB are evened for SSF2. (Aka moves dont do 4% and insane KB) Luma is a quite fast character with some mobility options, average damage output and has good kill potential, but lacks a lot in terms of range, so he needs to be really up clsoe in most cases. The moves with his racket equipped sport good range, but lack in the priority department. Lumas body has good priority, but, as statedabove, lacks range that fights with Ness´s for being worse. General info: Size: As big as Kirby, but hovers a bit over the ground. Crouching makes him almost as flat as Puff. Idle: Looks around and tries to make a tough face. Weight: Beats Puff, but not by much. Dash speed: Slightly slower than Tails. Walk speed is a bit worse than Marios. Air attributes: Average fall speed with tendency to be floatie. Air speed and mobility are above average, but not that much. Entrance: Flies in and makes his "WCHOOOO!" sound that plays if a Luma transforms in the Galaxy games. Jumps: SH is short (SURPRISE!), FH is a bit lower than marios, and DJ is meh. However, Luma sports three mid-air jumps to compensate. Moveset: Jab 1: A punch with the left. 2% per hit. Jab 2: Another punch, but this time he uses the right hand. 3% per hit. Jab 3: A body spin that can actually kill at 150%+. 5% per hit. Dash attack: Luma lunges forward at high speed, ramming his tiny body into foes. Bad priority, but is super fast and can start combos even at higher % due to low KB scaling. 4% per hit. FTilt: A kick forward. Bad range, bad launcher, but has good GTFO properties. 5% per hit. UTilt: A jump upwards. Good range (for Luma), can start combos, can juggle... Great move. 6% per hit. DTilt: Luma does a downward kick that actually moves him a bit into the direction hes looking at. Diagonal trajectory. 5% per hit. FSmash: Luma winds up, then does a twin punch. Reliable kill move at 115%+, but suffers in range. Has some lag to it. 9-18% per hit. USmash: An uppercut with one fist. Decent range and his best grounded kill move if sweetspotted. Sweetspot is at point blank in the first few frames, dealing 11-20% with great KB, and the sourspot is the rest of the move, delivering 5-10% with poor KB. Quick move. DSmash: Luma pulls out his tennis racket and spins it around in a frenzy at a low angle. Great range and multihitting. Really low angle, but can be teched with ease. 12-21% per hit. Nair: The tennis racket comes out again and Luma uses it to hit his foes (Doh) in front of him while kicking behind him at the same time. Really fast, autocancels. Racket deals 9% on hit and can has average, while Lumas kick does 6% and kan somewhat act as a kill move. Fair: An airial (Ok, hes always in the air) roundhouse kick. Poor range but is a great combo tool with lingering hitbox and is a potent blow. Autocancels. 7% per hit. Bair: A powerful kick without looking with both feet. Lacks in range, but has power to it that sends foes flying at a straight horizontal angle. Autocancels. 6% per hit. UAir: Luma throws hit tennis racket above him to deal multiple hits wiht a disjoint before chatching it. Great combo tool, can kill at later %, but has enough power to score a surprise KO near the blast line. Can go through edges of stages. 9% per hit. Dair: A fullforce kick downward with one foot. Average range, but boy this move has power as an edgeguarding tool. 5% per hit. Neutral B: Luma Tennis - Luma pulls out a tennis ball and his racket and goes into a serving position. B must be pressed again in order to serve the ball. If timed right, the ball will fly straight forward with a rainbow trail following it and do 9% with above average KB. If not timed right, the ball will fly in an arc with bad KB, but some hitstun and 6% on hit. Ball can be sliced up or down via inputs. If angled up, a red trail will follow the ball and a blue trail for downward shots. If it is not angled, the ball will have a yellow trail following it and the ball will fly in zigzaggy lines. This may sound useful, but the startup makes this move quite risky. Can be cancelled after a brief moment via shielding. Side B: Luma Spin - Luma does the spin attack from the Galaxy series. Similar to Star Spin, but this move delivers one powerful strike. Moves Luma upwards a bit if used airbone, but slows Luma down a lot. 9% per hit. Up B: Pull Star - Luma will spawn a Pull Star in front of him and then pull himself forward and towards it. Has heavy armor, but is slow and predictable. You have up to four seconds to alter your angle freely via inputs, but once this limit is reached, Luma will get flying on his own. The Pull Star can be moved as well with C Stick movements, but moving it too far will cause you to miss the pull completey and drop down to your doom. Once if you feel right with your postitioning stuff, simply hold B to get started earlier. Luma will pull him as long as B is hold, allowing for some neat momentum tricks n stuff. Once Luma realeases himself, he carries over his momentum and goes helpless, causing the Pull Star to disappear. The angle of the flight path also is slightly adjustable. Range goes from Little Mac to FW depending on the positioning of yourself in relativation to the Pull Star. The shorter the distance between you and the star is, the faster you move. Adjusting the angle lowers the speed slightly. Really tricky to master, but rewarding af once you get it down. Down B: Star Bits - Luma spins around, causing Star Bits to fall out of him in an arc around him. Canbe used to hinder approaches and grants protection against projectiles. He will also play the sound effect of being spinned in SMG2. The Star Bits deal 2% each with mediocre KB. Final Smash: FOR MAMA! - Thousands of Lumas appear onstage, trying to defend her Mama Rosalina (which... actually isnt onscreen during the FS). Each Luma does 1% with average KB and has a health of 1%, but the sheer number of them will overwhelm their opponents... Hopefully. Lumas can be attacked. Each Luma plays his "WCHOOOO!" sound from the entrance on appearing. Taunt: Luma looks around proudly and puts his hands to his hips. Side Taunt: Dances around happily. Up Taunt: Jumps three times out of joy. Ain´t he a fluffy pillow? Winning animation: Luma does a small dance out of joy before striking a final pose and high fiving the player. Underlined with the SMG1 main theme. Losing animation: Buries his face in his hands, crying. _________________ Join Team Star Flash! Shoutouts to Harr for this sick player card! Join Chibi Nation, the 20CR Discord for all aspiring Chibi-Robo mains! Click to expand thumbnail |
||||||||||||||||||||||||||||||||||||
| Mon Apr 27, 2015 1:33 pm |
|
||||||||||||||||||||||||||||||||||||
|
BR Member  Joined: Tue Jul 29, 2014 2:58 pm Posts: 1838 Location: Everywhere and Nowhere Country: ")
Gender: Male MGN Username: CSWooly Skype: CSWooly Currently Playing: Fire Emblem Fates: Birthright, SSF2, SSB4, League of Legends. |
Wolf:
Wolf is Fox McCloud's Rival and occasional "frenemy". He serves as the antihero in many of the games. He also has a history with Fox's father, James, and may have been involved in his death. Source Game: Star Fox/Super Smash Bros Brawl. General info: Size: Shorter than Fox, due to his crouch. A good comparison is this: 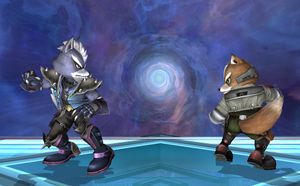 Click to expand thumbnail Idle: Stretches his arms wide with his claws out. Weight: 102. Slightly lighter than Link Dash speed: Medium. About the speed of Sora. Air attributes: Fast in the air. About the same speed as Jigglypuff. Entrance: Wolf ejects from a Wolfen. Jumps: Being the capable scientist he is, he managed to create jet boots for himself. This gives him three jumps. Ground Attacks: Jab - Wolf slashes with one arm, then the other, and then bites. Relatively fast startup, and the first hit guarantees the other two hits if it connects. F-Tilt - Wolf does a swipe with both arms whilst leaning forward. Has less freeze frames than in Brawl. U-Tilt - Wolf kicks upward with one foot in front of his body. Has a sweetspot at the foot. D-Tilt - Wolf does a claw swipe downwards while crouching. Dash Attack - Wolf uppercuts with his claw while running. Sends opponents upwards and can combo into an Up Smash at low percents in a similar manner to a Gatling Combo. F-Smash - Wolf stretches his arms in front of his body and thrusts forward, then twists his claws. Works exactly the same as it does in Brawl. U-Smash - Wolf does a half-moon slash with both claws. This move hits twice, with the first hit leading into the next. Has good KO potential. D-Smash - Wolf swipes his claws on both sides of his body. Wolf's most powerful KO move. Aerial Attacks: N-Air - Wolf curls up and flips several times. A multihitting N-Air that sends foes at the autolink angle. This means every hit will usually connect. F-Air - Wolf slashes with his arm. Sends foes upwards and is potent for juggling B-Air - Wolf dropkicks outward behind his body. Excellent spacing tool with good knockback. U-Air - Wolf claw swipes in an arc above his head. A good tool for juggling due to it's relatively low knockback. D-Air - Wolf strikes his arms downwards as if he's wielding an axe. This meteor smashes, however it gives a "bounce" effect similar to Mega Man's D-Air. Grabs and Throws: Grab Range - The same as Mario's. Pummel - Wolf punches the foe repeatedly. A fairly slow pummel. F-Throw - "Dunks" the foe and slashes forward. A good kill move. U-Throw - "Chucks" the foe as if he doesn't care. Little follow-up potential. B-Throw - Slams the opponent down and claws them behind himself. Has decent follow-up potential D-Throw - Throws the opponent on the ground, does a small jump and claws them. Works like Wario's D-Throw. Ledge Attacks: Ledge Attack - Flips onto the stage whilst axe kicking. Fairly slow. Getup Attack - Scissorkicks and then flips over. 100% Ledge Attack - Barrel Rolls onto the stage and claw swipes. Special Moves: Neutral Special - Blaster: Wolf pulls out a modified blaster, jumps, and fires twice on the ground and once in the air. Works as an excellent cover fire as the projectiles move slower than Wolf. Side-Special - Wolf Blast: Wolf uses his jetpack to power himself onto the stage. Has a very powerful sweetspot on Wolf that meteor smashes if it connects. If this does connect, Wolf will axe swipe forward. Can be angled, causes helplessness Up-Special - Jetpack: Based on the jetpack from StarFox Assault. Wolf will be able to fly high. Works like Robo-Burner, however will not sweetspot the ledge during his ascent. He can use an aerial or a special out of this move, however he will travel a shorter distance if he has used is third jump. Down-Special - Reflector Counter: Wolf uses his modified reflector. If Wolf is hit during the startup, he will take no damage and dash forward, saying "Can't let you do that!" before clawing behind him. It reflects projectiles when it is fully out, but it won't counter. Final Smash - Team Star Wolf: Wolf calls upon Team Star Wolf to assist him. This works in three stages: 1) Leon will charge in his Wolfen across the stage. Causing large damage to anyone he hits. 2) Pigma will fire bombs into the fray. These bombs work like Smart Bombs in Brawl and Smash 4. 3) Panther will fire lasers in a straight line downwards whilst moving across the stage. His Wolfen causes damage to anyone that hits. Wolf will then say "Playtime's over!" and detonate another bomb he just happened to have. Taunts and Other Poses: U-Taunt - Howls at the air D-Taunt - Salutes and mockingly says "Playtime's over". S-Taunt - Kicks in front of him, saying "What's the matter scared?" _________________ Follow me on Twitter here. Youtube channel.   Click to expand thumbnail SSF2 Backroom Character Analyst and Labber Mains: :lucario:  |
||||||||||||||||||||||||||||||||||||
| Fri May 08, 2015 4:40 am |
|
||||||||||||||||||||||||||||||||||||
|
BR Member Joined: Tue Jul 29, 2014 2:58 pm Posts: 1838 Location: Everywhere and Nowhere Country:
Gender: Male MGN Username: CSWooly Skype: CSWooly Currently Playing: Fire Emblem Fates: Birthright, SSF2, SSB4, League of Legends. |
Aegislash:
Source Game: Pokemon X and Y General info: Size: In game he is 5' 07", so slightly shorter than Samus. Idle: Crosses his sashes behind him Weight: In Sword Form, he is a light-middleweight, in Shield Form, he is a middle-heavyweight Dash speed: His base speed is 60 in game, giving him a medium dashing speed, but lower in Shield Form Air attributes: Once again, the speeds will be the same, however his air speed will be fairly low, but lower in Shield form. Entrance: Appears out of nowhere. (Spooky) Jumps: Due to the surprising lightness of his shield, his jumps are of medium height. Due to his general ghostliness, he can also float. Aegislash's Formes: Aegislash has two forms, representing his ability Stance Change. His moveset will vary depending on the form. In Sword Form, Aegislash gains higher attack power and slightly faster speed in Sword Form, however, he is KO'd more easily in Sword Form. In Sheild form, Aegislash loses the high attack power and speed, however gains a full "light armour" effect throughout. This allows Aegislash to take hits more easily. Blade Forme: show Shield Forme: show Special Moves: Neutral Special - Stance Change: Aegislash does the animation from X and Y, and switches between Shield and Blade Forme. Side-Special - Flash Cannon: Aegislash sends a silver beam flying forward. The move travels quickly and through opponents. However the shot is fairly small and easy to dodge. 3% per hit. Hits an enemy 5 times with no DI. Up-Special - Phantom Force: Aegislash disappears completely, and re-emerges somewhere else. The move resembles that of Warp, except Aegislash disappears during the move and will be given the option to attack upon completing the move. However, the move won't sweetspot the ledge if an attack is used. The attack does 13% Down-Special - King's Shield/Swords Dance: When in Shield Forme, Aegislash will use King's Shield. This works as a pseudo-counter. If an enemy hits Aegislash when in King's Shield, the enemy will suffer a 50% reduction in Knockback and Damage. When in Blade Forme, Aegislash will use Swords Dance, which will give him a 25% increase in Knockback and Damage for 5 seconds. Final Smash - Sacred Sword: Aegislash glows blue, waits for a bit, and immediately slashes the foe very powerful. The number of slashes is equal to the number of foes. The knockback is powerful enough to OHKO. 50% Taunts and Other Poses: U-Taunt - Lights up it's eye whilst a dark aura emanates from it. D-Taunt - Spins around, making it's cry S-Taunt - Using Shadow Sneak, Aegislash disappears and reappears Victory Pose - Proudly crosses his sashes behind him, whilst making it's cry. Defeated Pose - His fainting animation from X and Y EDIT 1 - Restructured the post ready for full moveset. EDIT 2 - Shield Forme is complete, and finished the taunts and other poses section. EDIT 3 - Fixed some grammar EDIT 4 - Sword Forme is mostly complete, however I'm still finalising specials. EDIT 5 - Blade Forme is complete. Specials are now complete. _________________ Follow me on Twitter here. Youtube channel. Click to expand thumbnail SSF2 Backroom Character Analyst and Labber Mains: :lucario: Last edited by TSF.Strife on Wed May 13, 2015 1:40 pm, edited 6 times in total. |
||||||||||||||||||||||||||||||||||||
| Tue May 12, 2015 9:45 am |
|
||||||||||||||||||||||||||||||||||||
|
SSF2 Developer  Joined: Wed Nov 24, 2010 11:11 pm Posts: 201 Location: Here. Country:
MGN Username: spid3y916 Currently Playing: SSF2 |
After this, I'm going to lock this up. I understand that you don't want the topic to die, but I feel that only one or two people are engaging. So yeah, after your post I'm going to shut it down. I suggest that you make it an amazing one. I am going to replace it with something else, however, which I hope will be more fun and engaging for everyone. |
||||||||||||||||||||||||||||||||||||
| Tue May 12, 2015 1:49 pm |
|
||||||||||||||||||||||||||||||||||||
|
SSF2 Developer  Joined: Tue Dec 11, 2012 6:47 pm Posts: 2316 Location: BC Country: ")
Gender: Male Currently Playing: Complacency breeds weakness. My opponents won't stop getting stronger, neither will I. |
Oh, snap. spid3y's a dev. Good job on becoming a part of the Spriting Department!
I don't feel like only a couple of people posting is worth shutting down this thread for, although hardly anyone ever did discussion of movesets and you never got around to ranking the characters based on your opinion. If this is what you want to do, I really hope the new thread totally supersedes this one in every way. I wonder if this new thread is going to also contain sprite art... _________________ Men that are trapped by the chains of "maybe" can never reach their dreams! The weak are washed away by the tides of fate. The strong drink it up. No matter the man, we all wear masks. Whether it be over our faces or over our hearts. Youtube: NinjaLobsterStudios Stream: twitch.tv/ninjalobster  Click to expand thumbnail |
||||||||||||||||||||||||||||||||||||
| Tue May 12, 2015 3:33 pm |
|
||||||||||||||||||||||||||||||||||||
|
Joined: Mon Aug 11, 2014 12:28 pm Posts: 151 Location: my mom's basement Country: ")
Gender: Anime Girl |
Congrats on your dev-hood, spid3y.
_________________  |
||||||||||||||||||||||||||||||||||||
| Tue May 12, 2015 8:18 pm |
|
||||||||||||||||||||||||||||||||||||
|
SSF2 Developer Joined: Wed Nov 24, 2010 11:11 pm Posts: 201 Location: Here. Country:
MGN Username: spid3y916 Currently Playing: SSF2 |
Thanks, guys.
The missing discussion and ranking are the main reasons why I'm shutting it down. I feel without those, this thread just become a place where people just dump their ideas just to have them out in the public. I really wanted it to be a place where people can make community movesets, not a bunch of solo ones.
Well I just got a little bit too excited and released it here. |
||||||||||||||||||||||||||||||||||||
| Tue May 12, 2015 9:28 pm |
|
||||||||||||||||||||||||||||||||||||
| Page 13 of 46 |
[ 689 posts ] | Go to page Previous 1 ... 10, 11, 12, 13, 14, 15, 16 ... 46 Next |
|
All times are UTC - 5 hours |
Who is online |
Users browsing this forum: No registered users and 1 guest |
| You cannot post new topics in this forum You cannot reply to topics in this forum You cannot edit your posts in this forum You cannot delete your posts in this forum You cannot post attachments in this forum |